Our Latest Product Updates
We’re constantly improving our product for our customers. See the latest features, improvements, and fixes we have shipped over the past month.
Customize your compliance view
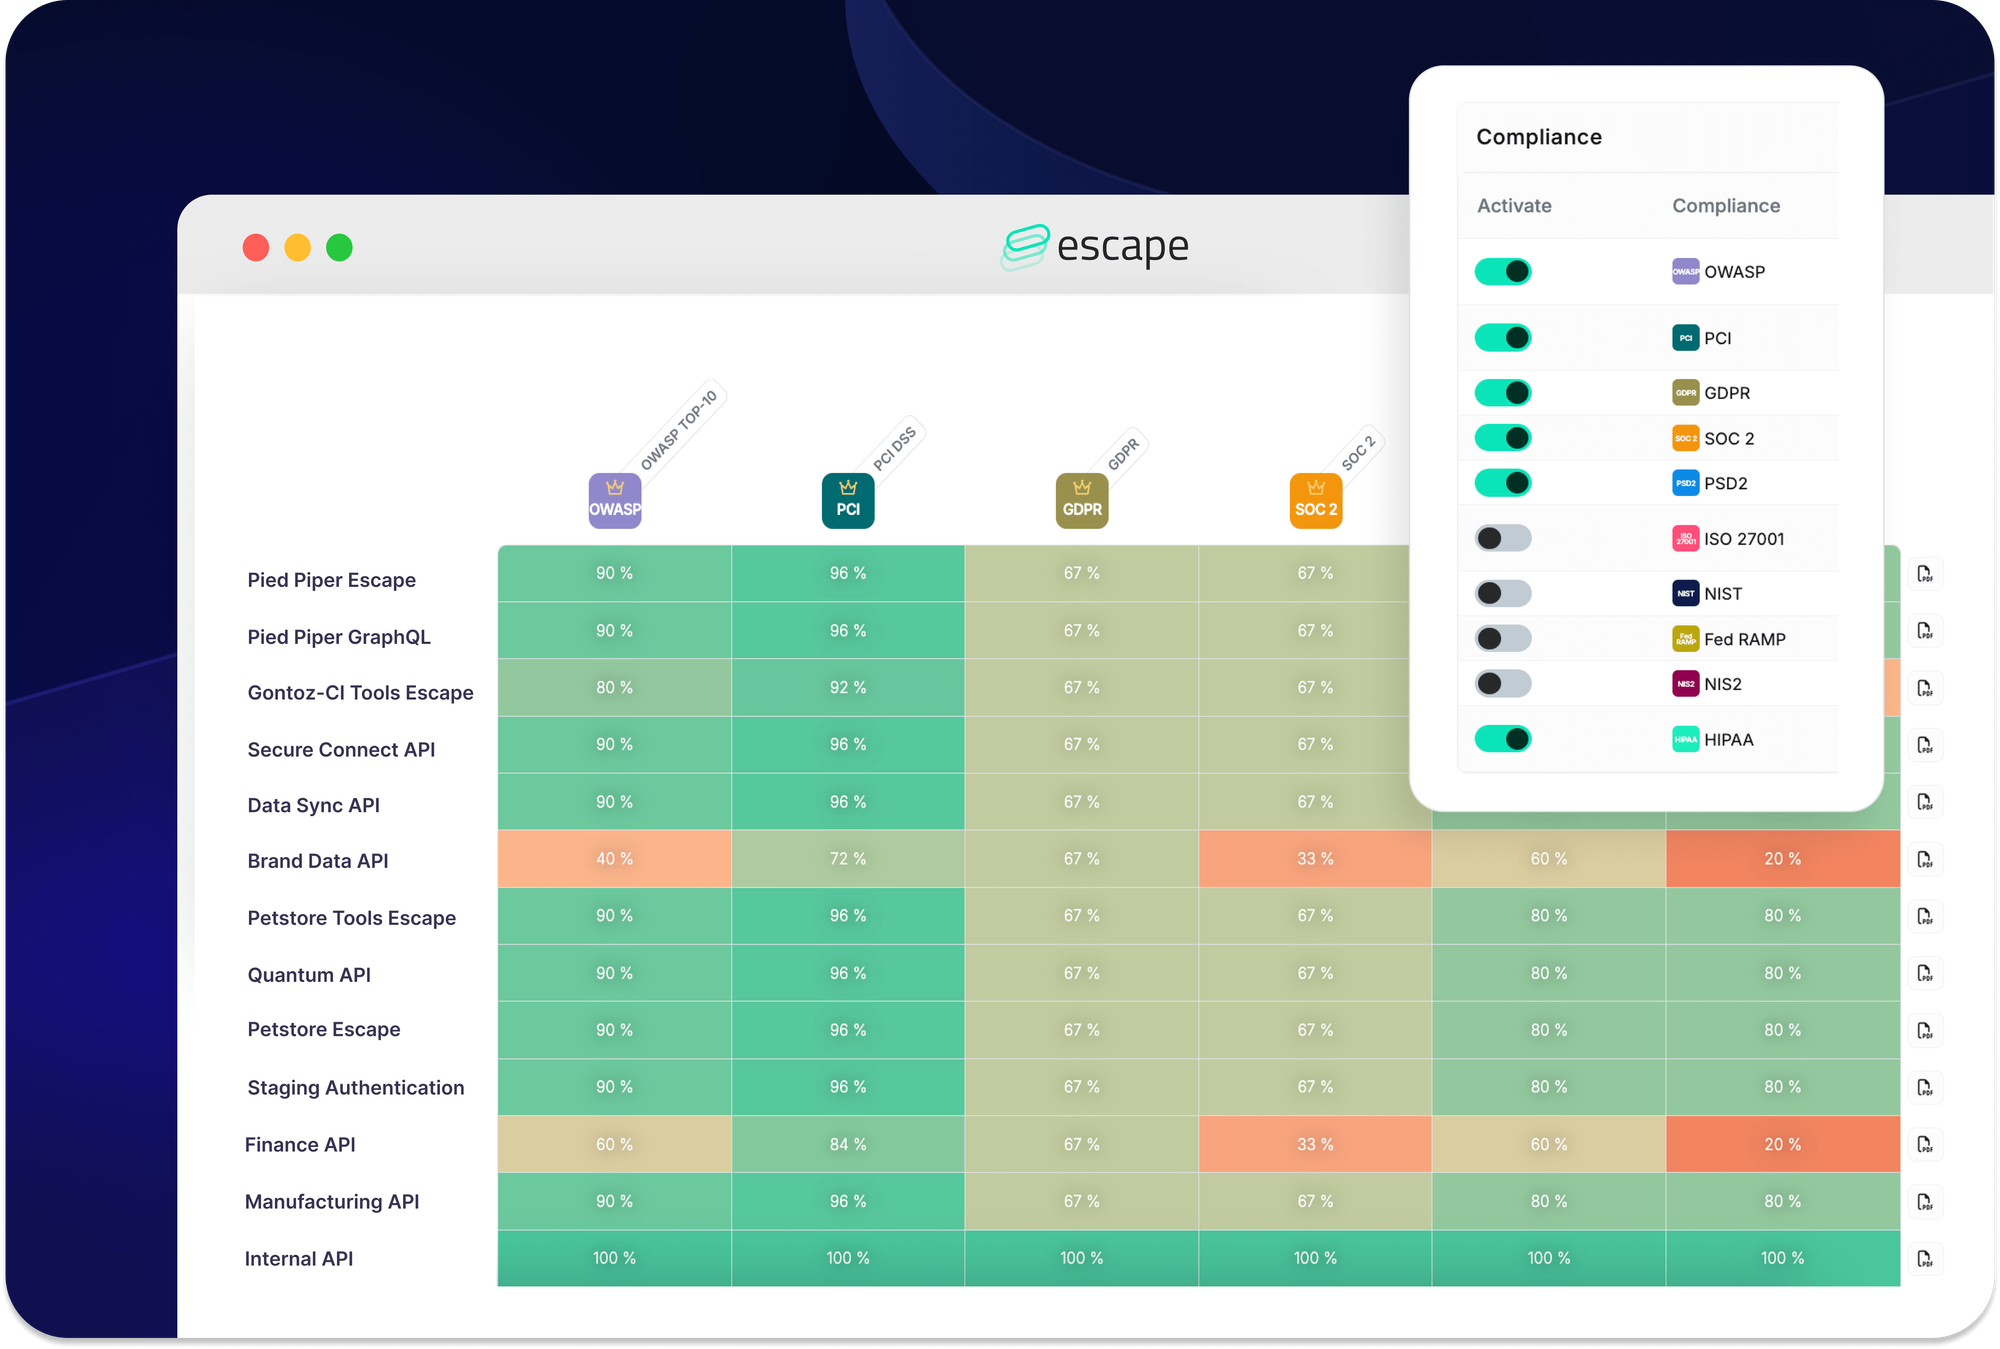
Last month we shipped a new feature designed to enhance your compliance management experience. It allows you to hide irrelevant compliance frameworks from your compliance matrix, tailoring it to your organization's specific needs.
Don’t care about HIPAA because you are in financial services? You can hide it from your view! Don’t want to see PCI-DSS because you are a healthcare company? Same here.
Why?
Managing compliance can be overwhelming. You might often face an array of frameworks, many of which may not apply to your specific business operations. By enabling you to deactivate non-relevant compliance frameworks, Escape ensures that you can concentrate on the requirements that truly matter, making your compliance efforts more focused and efficient.
Getting started
Ready to tailor your compliance matrix? Follow these simple steps:
- Go to Your Organization Page: Simply click on your organization's name in the left-side bar.
- Select Compliance: Click on the "Compliance" tab to access your compliance settings.
- Deactivate Irrelevant Frameworks: In the compliance settings, you will see a list of compliance frameworks. Simply deactivate the ones that do not matter for your business.
And that's it! We're here to help you focus on what matters.
Export your scan & all issues reports in CSV
You can now export your scan, and issues report in CSV format. This update includes the ability to export the following tables:
- Inventory (available previously)
- All Issues
- Scan Report for a Particular App
Why?
Exporting reports in CSV format offers several significant benefits:
- Ease of Analysis: CSV files can be easily opened and analyzed using various tools like Excel, Google Sheets, and data analysis software.
- Custom Reporting: Create custom reports by filtering, sorting, and manipulating the data according to your needs.
- Enhanced Accessibility: Share and collaborate with team members more effectively by distributing CSV files.
Getting Started
Here's a detailed look at what you can export and how you can use these CSV reports:
All Issues
First, navigate to the All Risks tab, then click on "Export All issues". And that's it!
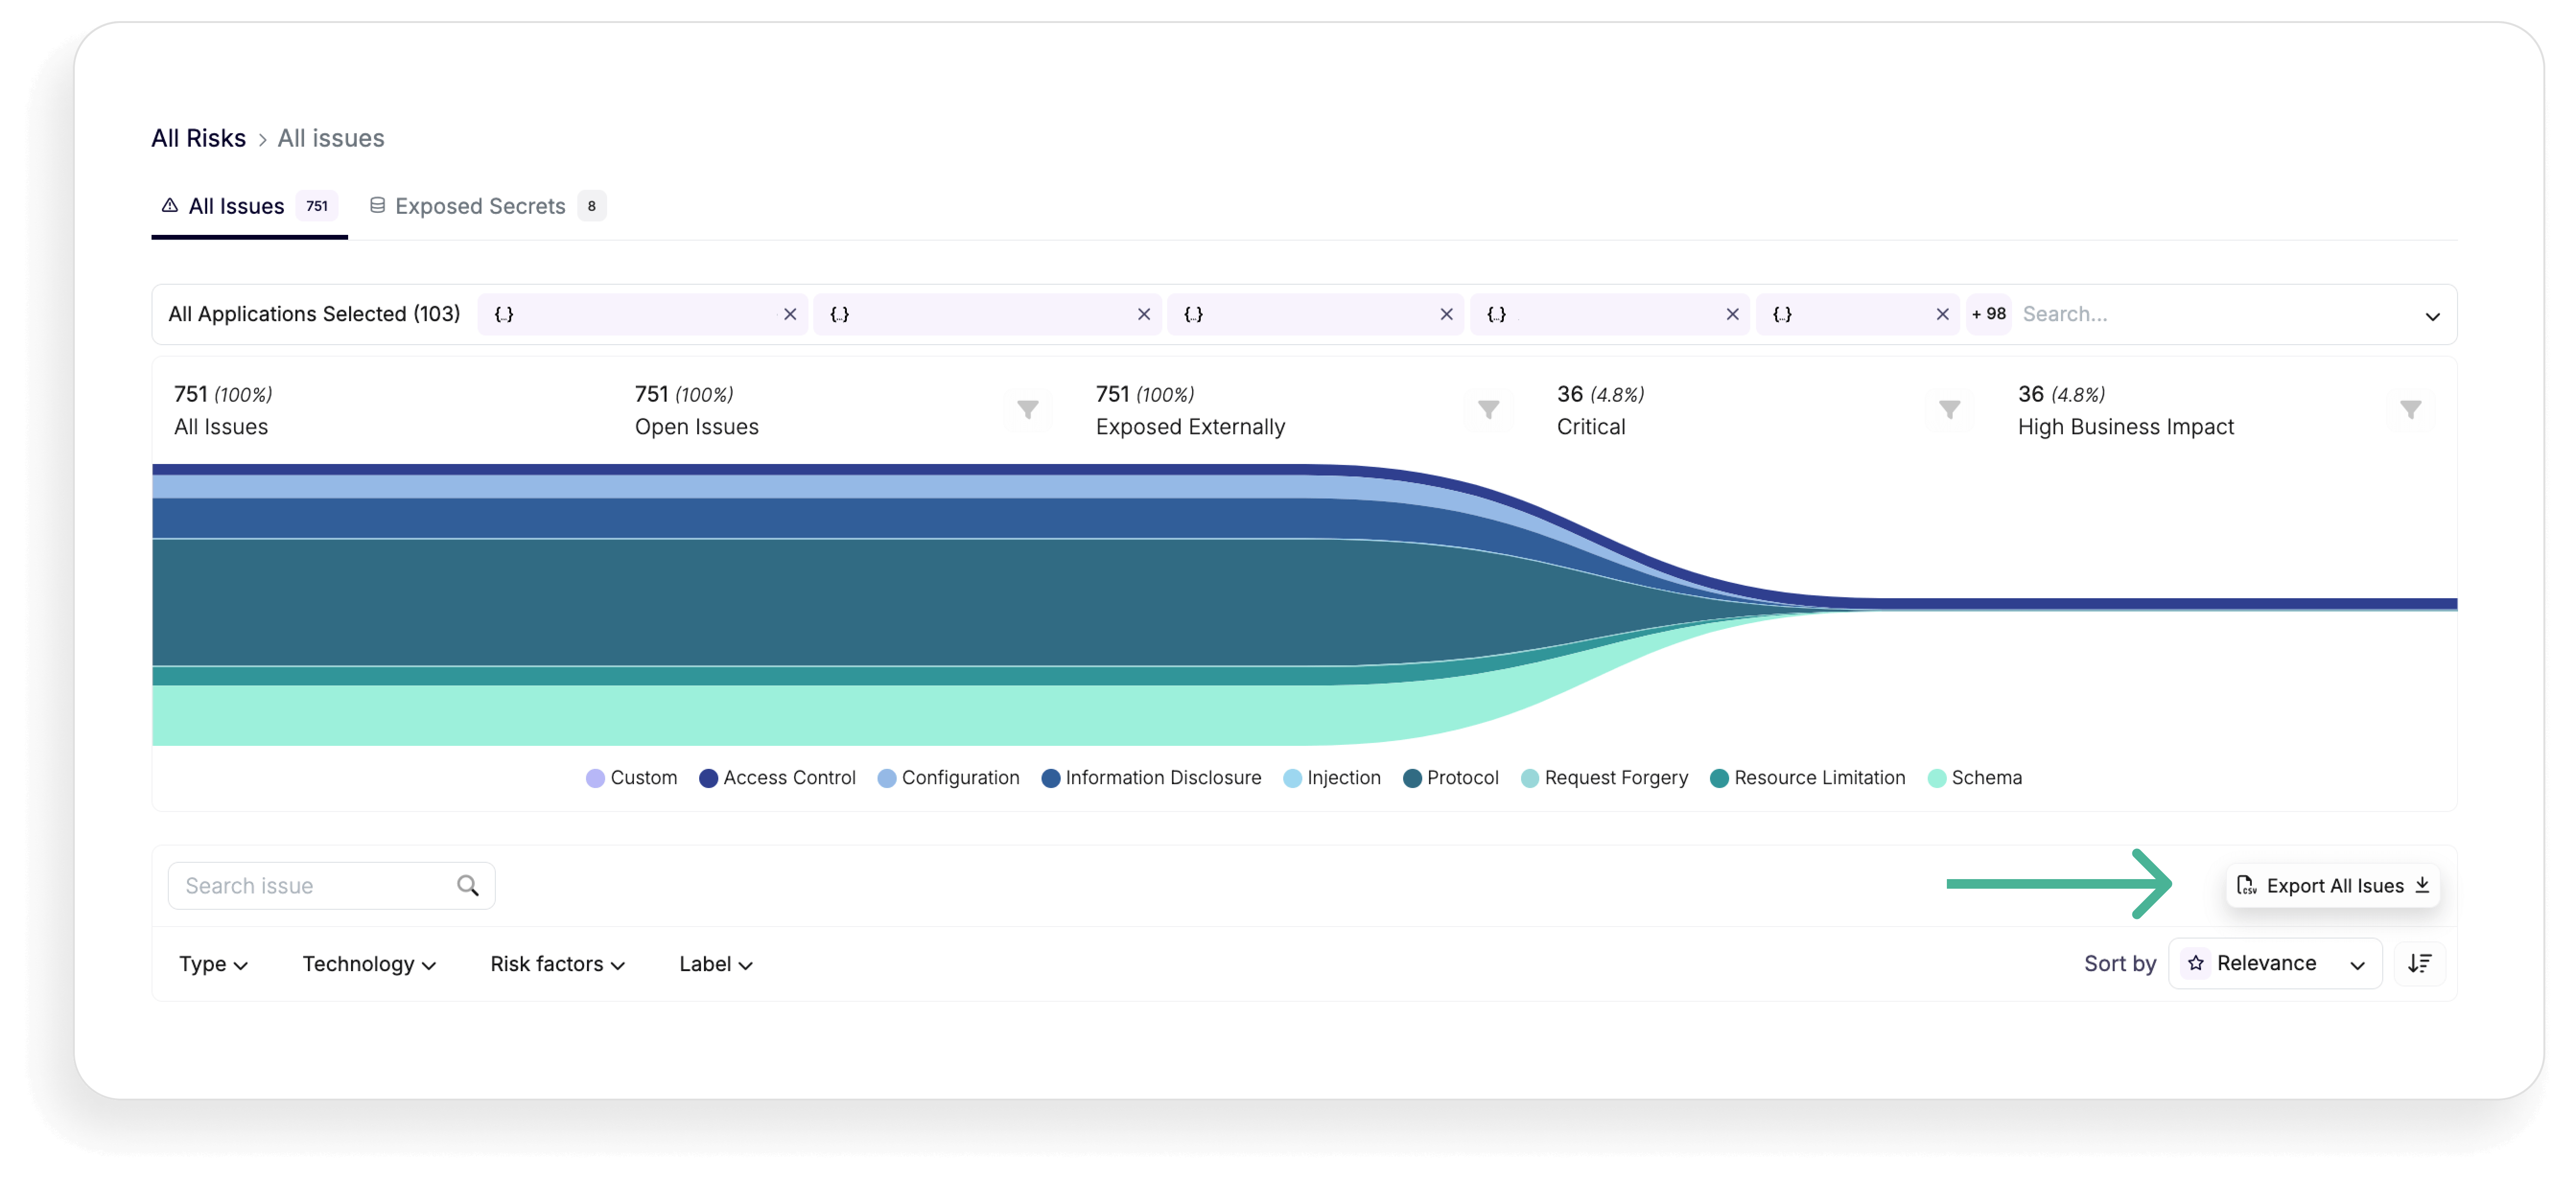
The "All Issues" export allows you to view detailed information about every issue identified across your assets. The exported CSV will include the following columns:
- FailureName: The name of the issue. For example, Enumeration (BOLA/IDOR) detected.
- AlertDescription: A description of the alert. For example, "We performed a successful BOLA attack on the
petIdargument." - IssueId: The unique identifier for the issue.
- Category: The category of the issue. For example, ACCESS_CONTROL.
- Severity: The severity level of the issue, according to Escape Severity.
- AlertLink: A link to the alert.
- ScanId: The identifier for the scan that found the issue.
- ScanLink: A link to the scan details.
- Endpoint: The endpoint where the issue was found.
- EndpointType: The type of endpoint (REST, GraphQL…).
- FirstSeen: The first date the issue was seen.
- LastSeen: The last date the issue was seen.
- Remediation: Suggested remediation steps.
- Ignored: Whether the issue is marked as ignored.
- Cvss_score: The CVSS score indicating the severity of the vulnerability.
Scan Report for a Particular App
First, navigate to the can that you want to export, then click on "Download Report". Pick .csv file and that's it!

For a detailed scan report of a particular app, you can export data including:
- AlertDescription: A description of the alert.
- IssueId: The unique identifier for the issue.
- Category: The category of the issue.
- Severity: The severity level of the issue.
- AlertLink: A link to the alert.
- ScanLink: A link to the scan details.
- Endpoint: The endpoint where the issue was found.
- EndpointType: The type of endpoint (REST, GraphQL…).
- FirstSeen: The first date the issue was seen.
- LastSeen: The last date the issue was seen.
- Remediation: Suggested remediation steps.
- Ignored: Whether the issue is marked as ignored.
With these new export capabilities, you can streamline your workflow, enhance your reporting, and ensure that you have all the necessary data at your fingertips.
Understand what's most important for you and make informed decisions with ease.
Introducing "Software" in inventory: Differentiate self-hosted third-party services
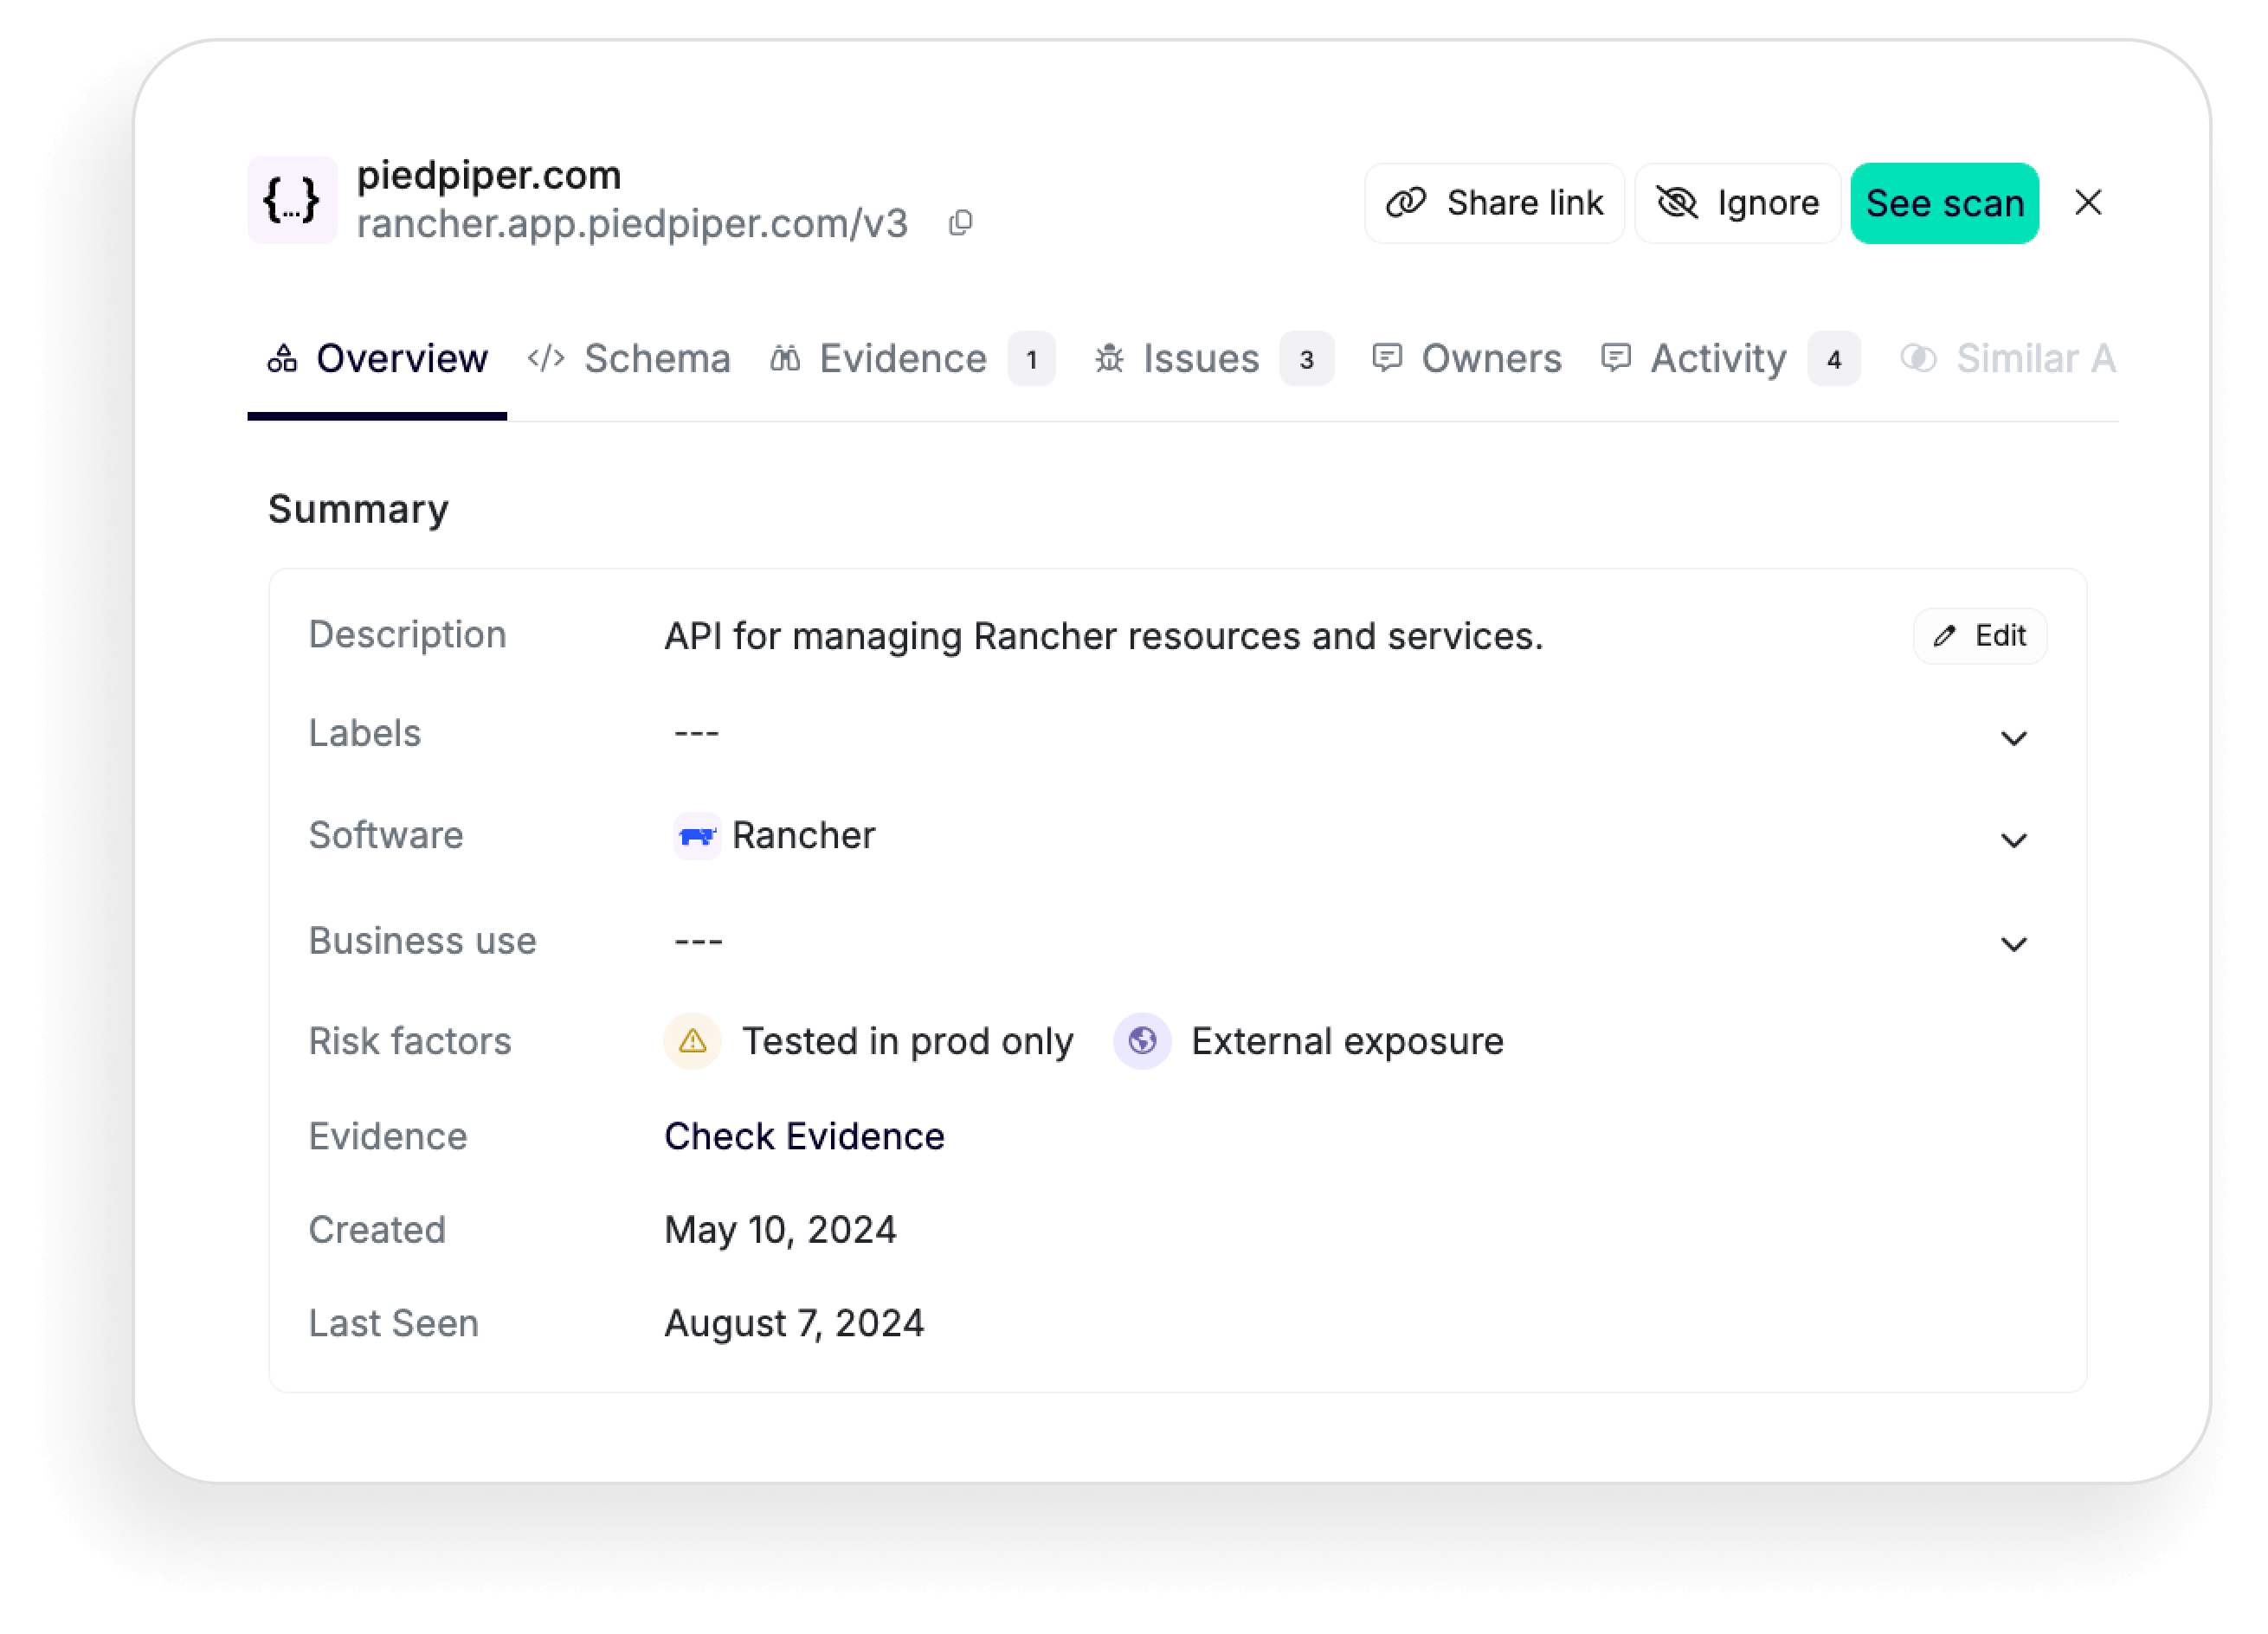
In each API service, you can now view the "Software" line, which helps you answer the question, "What are my self-hosted third-party services?" This enhancement marks the beginning of our journey towards supporting third-party services within the Escape platform.
Why
The inclusion of "Software" in our API inventory addresses a critical need: the ability to differentiate between first-party and third-party APIs. This distinction is crucial for various operational and security processes. For instance, customers can now choose to disable security scans on these self-hosted third-party services, streamlining their operations and focusing on what's most relevant to their unique setups.
Getting started
To get started, navigate to your API inventory and select a particular API service. You'll be able to view the associated software, such as this example API service for managing Rancher resources:
Some examples of software that can be listed include popular tools and platforms like:
- MongoDB
- PostgreSQL
- Ghost
- MySQL
- Rancher
- Portainer
- Gluu Server
- LemonLDAP
- WireGuard
- OpenVPN
- ownCloud
...and many more.
Additionally, when you export your API inventory in CSV format, you'll be able to visualize all your associated self-hosted third-party services under the wellKnownService column, enabling simplified analysis. Give it a try!
New way to prioritize issues: Focusing on Escape Severity
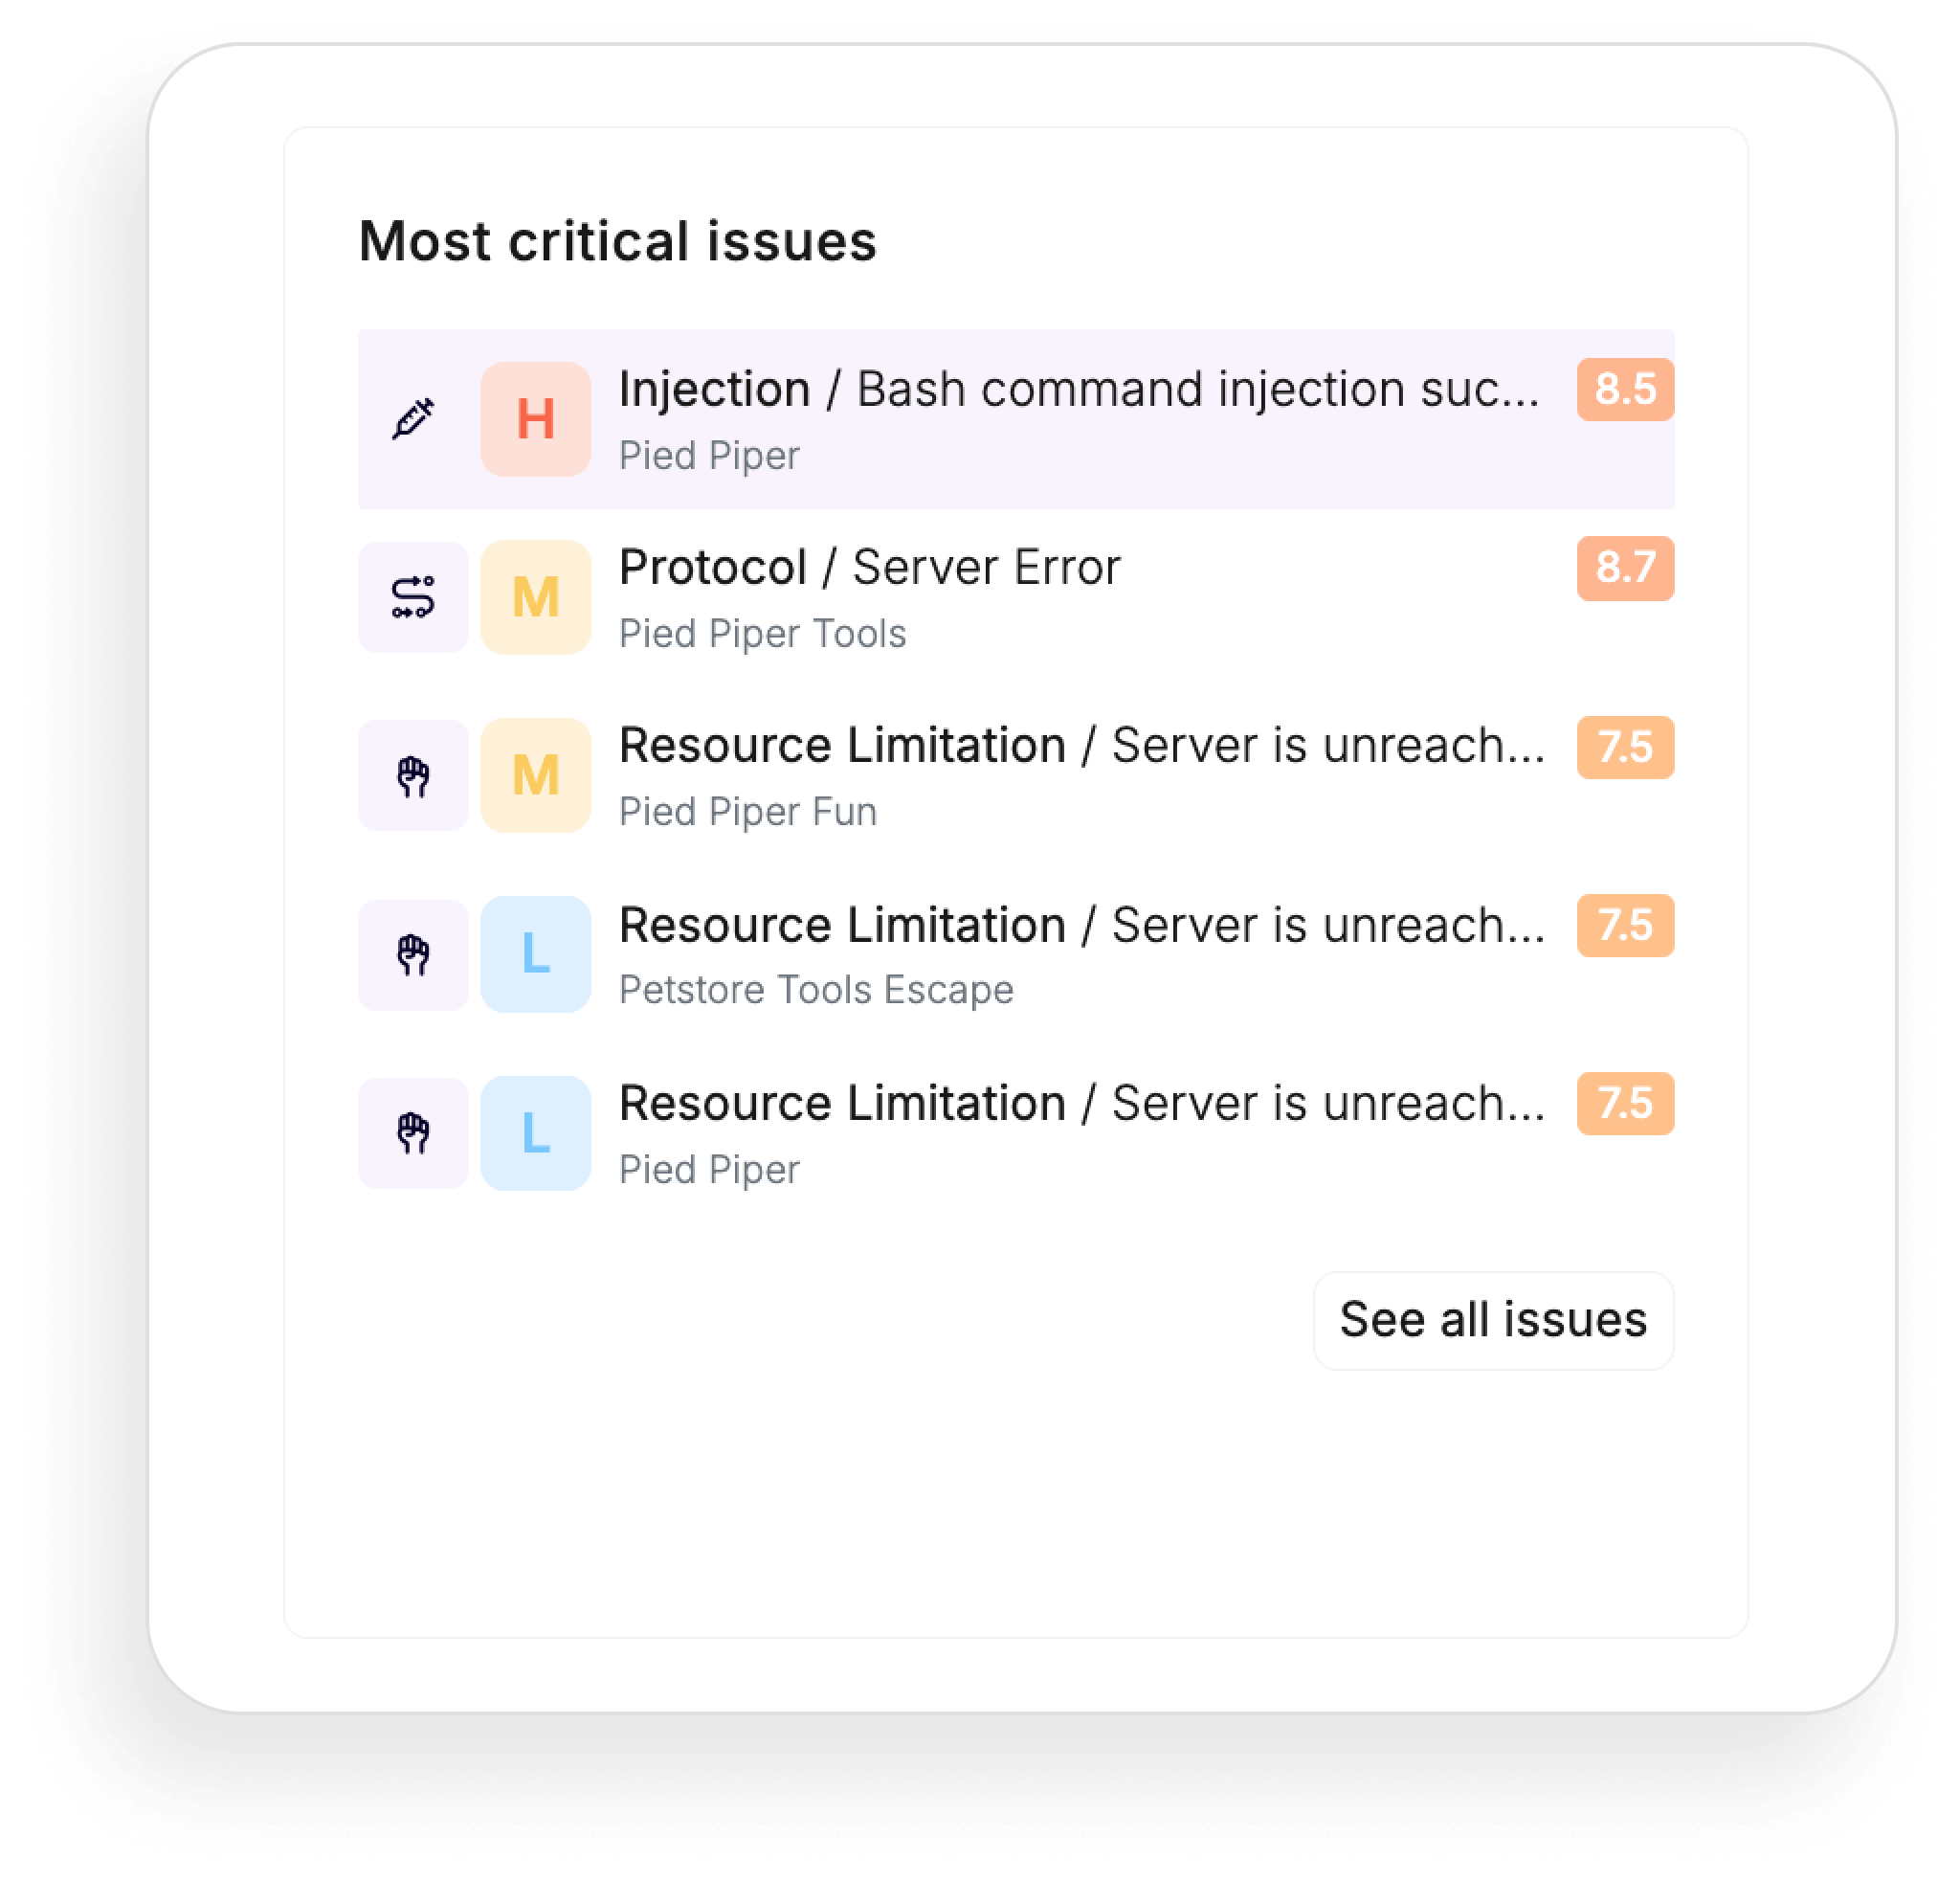
In your Reporting dashboard, you’ll notice an update in how we categorize critical issues. We’re moving away from the traditional CVSS score-based system and adopting a new approach that highlights Escape Severity, including context related to API services.
Why
We’re making this change to give you a more accurate, contextual, and actionable assessment of vulnerabilities. While CVSS scores provide a numerical risk measure, they don’t always capture the full picture. Escape Severity considers various factors such as the type of vulnerability, its exploitability, CVSS score, and other risk factors.
This comprehensive approach helps us better align issue prioritization with real-world risks and ensures you tackle the most critical issues more effectively.
Getting Started
To see this in action, go to the Reporting tab and select Overview.
You’ll now find that the most critical issues are arranged by Escape Severity!
We're planning to release major updates in August and September, so stay tuned
💡Check out our other exciting product updates:
