Using Protobuf with TypeScript
We recently moved to Protobuf to enforce consistency. Discover the pros and cons of migration to Protobuf and follow the step-by-step guide to create a tiny TypeScript-Protobuf prototype.

At Escape, our technical stack is written in several languages because some are better suited than others, depending on what we are trying to achieve. All our projects are then deployed as Kubernetes pods, interconnected by a Kafka broker. We used to communicate events in serialized JSON, but we recently moved to Protobuf to enforce consistency. This article will describe the pros and cons of such a migration, as well as guide you through creating a tiny TypeScript-Protobuf prototype.
Since Protobuf is a specification, there are many implementations available on NPM. We decided to pick one that is maintained, developed in modern JavaScript and advertises a high conformance level: Protobuf-ES.
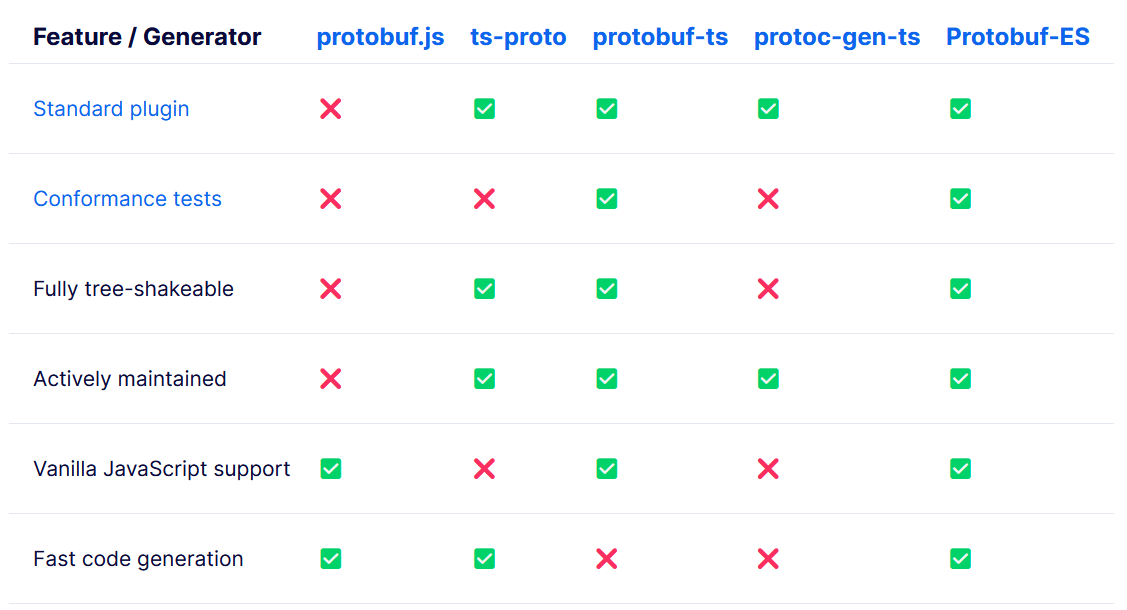
This comparison table can be found in the release announcement of Protobuf-ES, making it far from neutral, but yet we found it very accurate.
Why Protobuf?
Using Protobuf enables safe cross-language communication. All possible messages are declared in proto files and known at compile time. The potential loss of flexibility is compensated with a gain in soundness: it is not possible to send arbitrary messages anymore.
A proto file looks like this:
// Tell the compiler that we use the latest syntax
syntax = "proto3";

// It is possible to import declarations
import "google/protobuf/timestamp.proto";

// A User is a message with two primitive fields
message User {
  string name = 1;
  bool active = 2;
}

message Message {
  int32 id = 1;
  string body = 2;
  // Messages can be nested structures
  User user = 3;
  // Reference a foreign type published by Google
  google.protobuf.Timestamp date = 4;
}
Proto files are compiled to native JavaScript classes, allowing instantiation and serialization:
const message = new Message({
  id: 1001,
  body: "Hello, world!",
  date: Timestamp.fromDate(new Date()),
  user: {
    active: true,
    name: "Alice",
  },
});

const bytes = message.toBinary();
console.log(bytes); // Uint8Array ready for wire transfer

// Another service can parse the message received
const received = Message.fromBinary(bytes);
console.log(message.body);
The byte array can then be parsed by another service as long as it uses the same proto file.
This should give you a better understanding of what Protobuf is, and how it can work for you. As promised, here are what we found to be pros and cons of working with Protobuf.
Pros of working with Protobuf
- Cross-language type-safety
- Binary serialization, which should be slightly lighter than JSON when using numbers and booleans
- No arbitrary messages anymore
Cons of working with Protobuf
- Requires an extra build step
- The developer experience depends on the quality of the code produced by the compiler – a bad compiler will ruin your experience
- Yet another file format to learn
- No arbitrary message anymore – which can be both a blessing and curse depending on your use case
If cross-language type-safety is not in your requirements and you only need TypeScript-to-TypeScript communication, you should consider creating Zod schemas, they will probably be better suited for your needs.
Getting started with Protobuf
If you are still reading, chances are that you are interested in trying to build something with Protobuf. We will guide you through creating a tiny real-time webchat.
Let's start with the simplest proto file possible: a single message with two fields.
syntax = "proto3";

message Message {
  string author = 1;
  string body = 2;
}
We will compile this declaration to a JavaScript class using Buf CLI:
# Install the dev tools
yarn add -D @bufbuild/protoc-gen-es @bufbuild/buf

# Install the runtime
yarn add @bufbuild/protobuf

# Compile the proto files to code
yarn buf generate <proto dir>
Compiling to TypeScript requires a config file, you can find the complete example on GitHub.
Let's import the compiled proto file to create a local event broker:
import EventEmitter from "node:events";
import { Message } from "./proto/chat_pb.js";

const broker = new EventEmitter();

/** Emits a message to all listeners. */
export const emit = (message: Message) => {
  // Convert the message to binary
  broker.emit("message", message.toBinary());
};

/** Triggers a callback on incoming messages. */
export const listen = (callback: (message: Message) => void) => {
  const listener = (raw: Uint8Array) => {
    // Parse the binary message
    callback(Message.fromBinary(raw));
  };
  broker.addListener("message", listener);
  return () => {
    broker.removeListener("message", listener);
  };
};
We can use this broker in an Express app to exchange messages with clients. We will use server-sent events (SSE) rather than websockets, given how simple it is to create a server and a client.
import express from "express";
import * as broker from "./broker.js";
import { Message } from "./proto/chat_pb.js";

const app = express();

// Post route to receive incoming messages
app.post("/post", express.json(), (req, res) => {
  try {
    // Use Protobuf to validate the message
    const message = Message.fromJson(req.body);

    broker.emit(message);
    res.sendStatus(204);
  } catch (error) {
    // Protobuf runtime will throw an error if the message is invalid
    if (error instanceof Error) res.status(400).end(error.message);
    else res.sendStatus(500);
  }
});

// SSE route to broadcast messages to clients
app.get("/messages", (req, res) => {
  res.setHeader("Content-Type", "text/event-stream");

  const removeListener = broker.listen((message) => {
    // `message` is guaranteed to have all the props we need
    res.write(`data: ${JSON.stringify(message)}\r\n\r\n`);
  });

  req.on("close", removeListener);
});
We made broket.emit and broker.listen type-safe at compilation and runtime thanks to Protobuf. ✨
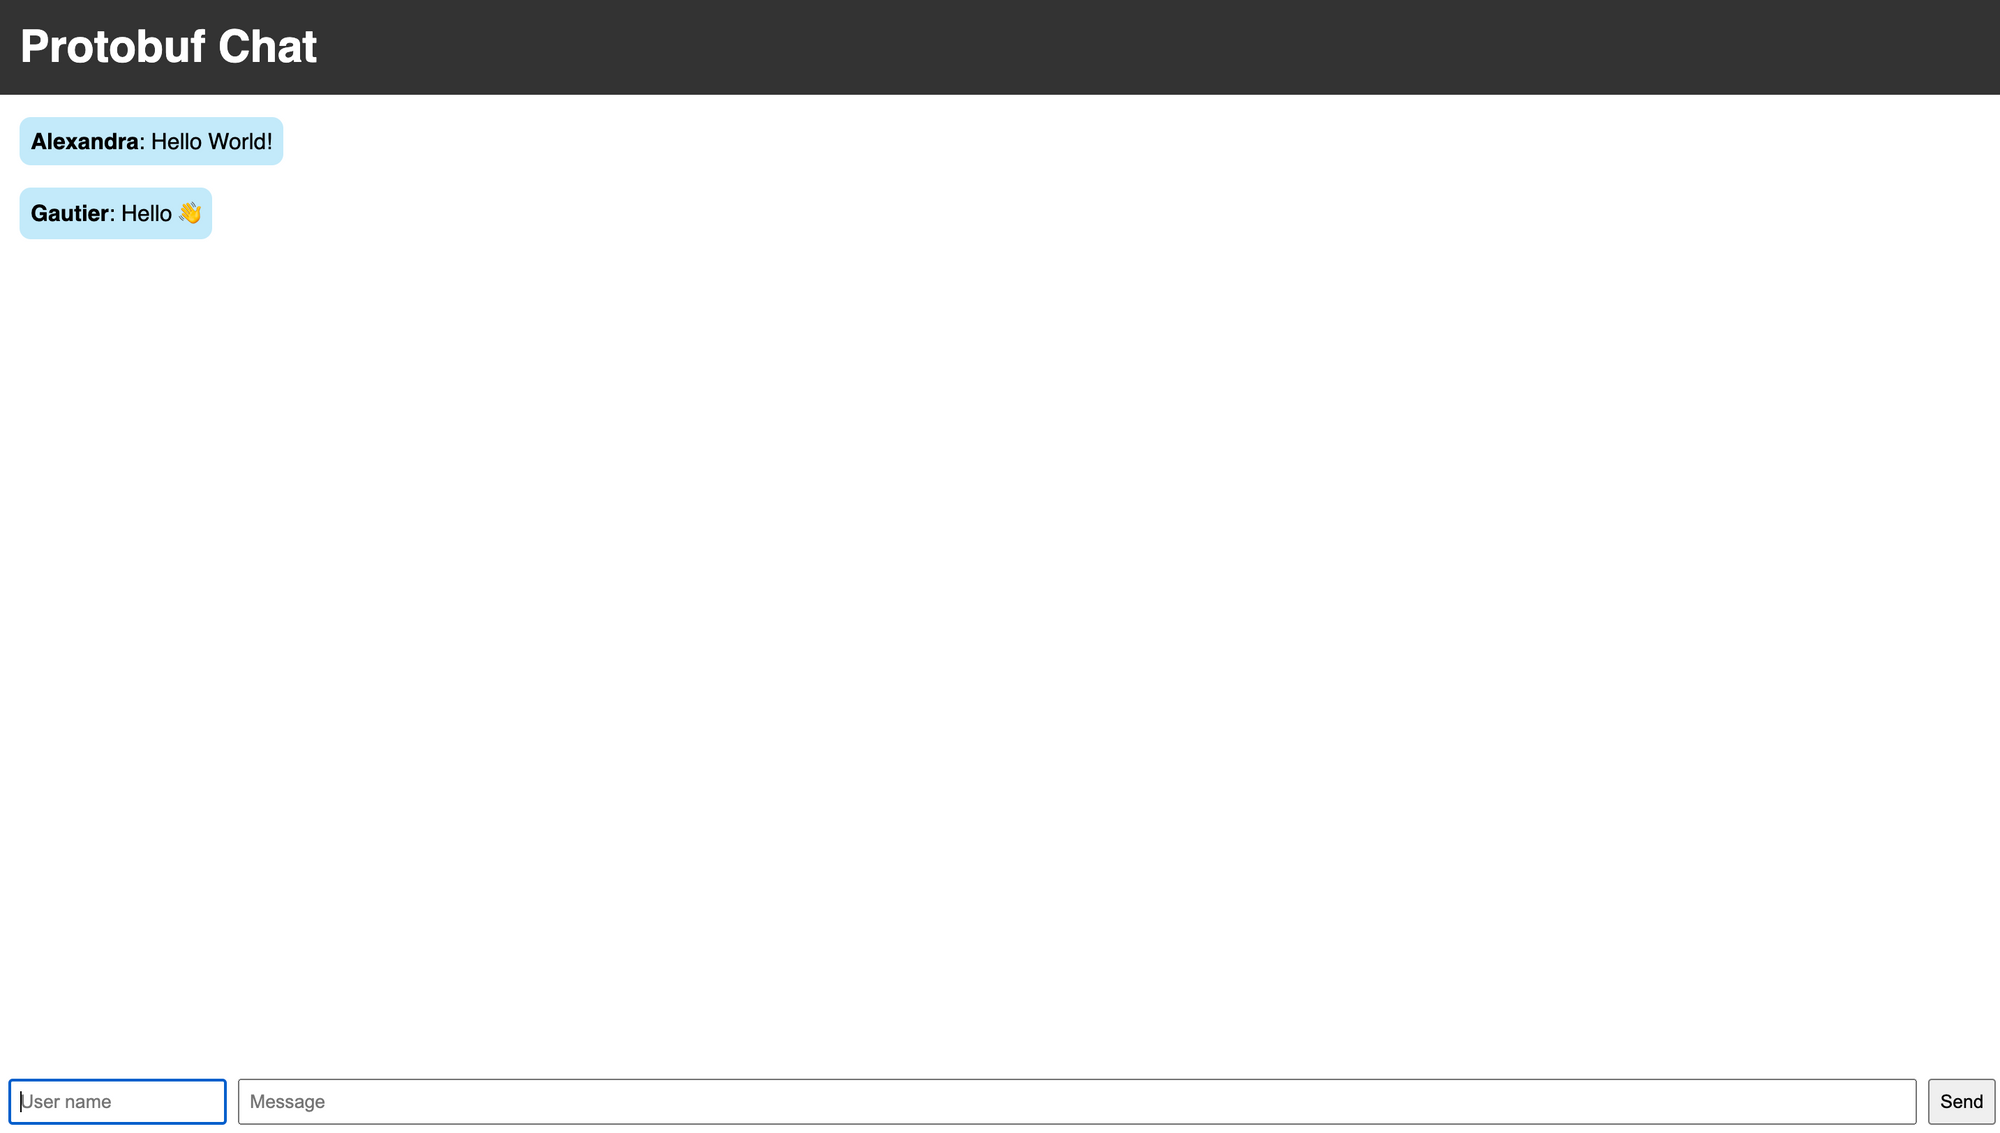
A few lines of HTML, JavaScript and CSS to have a working frontend and voilà! A working webchat.
This concludes this article; we hope you enjoyed it and found it insightful. Feel free to share comments where you found it; we look forward to hearing from you.
Want to learn more?
Check out the following articles:
- How to set up a TypeScript Monorepo
- Building a type-safe Fullstack Application with GraphQL codegen: "There are two approaches to defining your schema in GraphQL: schema-first and code-first. When using Typescript, you might find yourself having to write types again and again. Enters GraphQL codegen: your schema file becomes the single source of truth."
- Achieving end-to-end type safety in a modern JS GraphQL stack - Part 1
- Achieving end-to-end type safety in a modern JS GraphQL stack – Part 2